Evil Resource

Mr Everywhere (Resident Evil 7 Biohazard)

Image of Mr Everywhere
A small bobble-head sports figurine.

As the name implies, these little guys are located in lots of different places throughout the game. You know you're in the immediate vicinity of one when you here a soft jingling rattling sound. If you destroy all 20 of these you will receive bonus items after completing the game.
CategoryMiscellaneous object

Related product

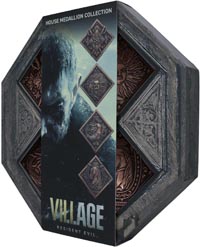
Resident Evil Village Replica House Crest Medallion Set

Resident Evil Village Replica House Crest Medallion Set

Buy the Resident Evil Village Replica House Crest Medallion Set on Amazon

Location

  • Image of Main Corridor - Main House 1F

    Main Corridor - Main House 1F

    Easy
    On the shelves in the small storage area in the south east end of the corridor.
    View location | Show on map
  • Image of Main Corridor - Main House 1F

    Main Corridor - Main House 1F

    Normal
    On the shelves in the small storage area in the south east end of the corridor.
    View location | Show on map
  • Image of Main Corridor - Main House 1F

    Main Corridor - Main House 1F

    Madhouse
    On the shelves in the small storage area in the south east end of the corridor.
    View location | Show on map
  • Image of Laundry Room - Main House 1F

    Laundry Room - Main House 1F

    Easy
    Underneath one of the tables.
    View location | Show on map
  • Image of Laundry Room - Main House 1F

    Laundry Room - Main House 1F

    Normal
    Underneath one of the tables.
    View location | Show on map
  • Image of Laundry Room - Main House 1F

    Laundry Room - Main House 1F

    Madhouse
    Underneath one of the tables.
    View location | Show on map
  • Image of Main Hall - Main House 1F

    Main Hall - Main House 1F

    Easy
    On the small semi-circular table next to the west double doors.
    View location | Show on map
  • Image of Main Hall - Main House 1F

    Main Hall - Main House 1F

    Normal
    On the small semi-circular table next to the west double doors.
    View location | Show on map
  • Image of Main Hall - Main House 1F

    Main Hall - Main House 1F

    Madhouse
    On the small semi-circular table next to the west double doors.
    View location | Show on map
  • Image of Recreation Room - Main House 2F

    Recreation Room - Main House 2F

    Easy
    Inside the wicker container on the stacked furniture in the north east corner of the room.
    View location | Show on map
  • Image of Recreation Room - Main House 2F

    Recreation Room - Main House 2F

    Normal
    Inside the wicker container on the stacked furniture in the north east corner of the room.
    View location | Show on map
  • Image of Recreation Room - Main House 2F

    Recreation Room - Main House 2F

    Madhouse
    Inside the wicker container on the stacked furniture in the north east corner of the room.
    View location | Show on map
  • Image of Drawing Room - Main House 1F

    Drawing Room - Main House 1F

    Easy
    In the gap of the frame of the door in the north east corner of the room.
    View location | Show on map
  • Image of Drawing Room - Main House 1F

    Drawing Room - Main House 1F

    Normal
    In the gap of the frame of the door in the north east corner of the room.
    View location | Show on map
  • Image of Drawing Room - Main House 1F

    Drawing Room - Main House 1F

    Madhouse
    In the gap of the frame of the door in the north east corner of the room.
    View location | Show on map
  • Image of Back Passageway - Processing Area

    Back Passageway - Processing Area

    Easy
    On the floor next to the buckets near the door on the west side of the passage.
    View location | Show on map
  • Image of Back Passageway - Processing Area

    Back Passageway - Processing Area

    Normal
    On the floor next to the buckets near the door on the west side of the passage.
    View location | Show on map
  • Image of Back Passageway - Processing Area

    Back Passageway - Processing Area

    Madhouse
    On the floor next to the buckets near the door on the west side of the passage.
    View location | Show on map
  • Image of Courtyard - Yard

    Courtyard - Yard

    Easy
    Underneath the steps leading into the trailer.
    View location | Show on map
  • Image of Courtyard - Yard

    Courtyard - Yard

    Normal
    Underneath the steps leading into the trailer.
    View location | Show on map
  • Image of Courtyard - Yard

    Courtyard - Yard

    Madhouse
    Underneath the steps leading into the trailer.
    View location | Show on map
  • Image of Old Shack - Old House 1F

    Old Shack - Old House 1F

    Easy
    On the shelves in the south west corner of the room.
    View location | Show on map
  • Image of Old Shack - Old House 1F

    Old Shack - Old House 1F

    Normal
    On the shelves in the south west corner of the room.
    View location | Show on map
  • Image of Old Shack - Old House 1F

    Old Shack - Old House 1F

    Madhouse
    On the shelves in the south west corner of the room.
    View location | Show on map
  • Image of Cellar Stairs - Old House 1F

    Cellar Stairs - Old House 1F

    Easy
    Next to the wooden pallet at the foot of the stairs.
    View location | Show on map
  • Image of Cellar Stairs - Old House 1F

    Cellar Stairs - Old House 1F

    Normal
    Next to the wooden pallet at the foot of the stairs.
    View location | Show on map
  • Image of Cellar Stairs - Old House 1F

    Cellar Stairs - Old House 1F

    Madhouse
    Next to the wooden pallet at the foot of the stairs.
    View location | Show on map
  • Image of Dilapidated Room - Old House 1F

    Dilapidated Room - Old House 1F

    Easy
    Inside the crawlspace that runs underneath this room. This is on the top of a metal unit near the far side of the crawlspace.
    View location | Show on map
  • Image of Dilapidated Room - Old House 1F

    Dilapidated Room - Old House 1F

    Normal
    Inside the crawlspace that runs underneath this room. This is on the top of a metal unit near the far side of the crawlspace.
    View location | Show on map
  • Image of Dilapidated Room - Old House 1F

    Dilapidated Room - Old House 1F

    Madhouse
    Inside the crawlspace that runs underneath this room. This is on the top of a metal unit near the far side of the crawlspace.
    View location | Show on map
  • Image of Altar - Old House 2F

    Altar - Old House 2F

    Easy
    On the chest of draws in the middle of the eastern section of the room, opposite the scale puzzle.
    View location | Show on map
  • Image of Altar - Old House 2F

    Altar - Old House 2F

    Normal
    On the chest of draws in the middle of the eastern section of the room, opposite the scale puzzle.
    View location | Show on map
  • Image of Altar - Old House 2F

    Altar - Old House 2F

    Madhouse
    On the chest of draws in the middle of the eastern section of the room, opposite the scale puzzle.
    View location | Show on map
  • Image of Attic - Main House Attic

    Attic - Main House Attic

    Easy
    On the ledge of the ladder entrance.
    View location | Show on map
  • Image of Attic - Main House Attic

    Attic - Main House Attic

    Normal
    On the ledge of the ladder entrance.
    View location | Show on map
  • Image of Attic - Main House Attic

    Attic - Main House Attic

    Madhouse
    On the ledge of the ladder entrance.
    View location | Show on map
  • Image of Barn - Testing Area 1F

    Barn - Testing Area 1F

    Easy
    On one of the southern posts of the central cattle grid. Can be easily spotted from the upper walkway.
    View location | Show on map
  • Image of Barn - Testing Area 1F

    Barn - Testing Area 1F

    Normal
    On one of the southern posts of the central cattle grid. Can be easily spotted from the upper walkway.
    View location | Show on map
  • Image of Barn - Testing Area 1F

    Barn - Testing Area 1F

    Madhouse
    On one of the southern posts of the central cattle grid. Can be easily spotted from the upper walkway.
    View location | Show on map
  • Image of Exit Hallway - Testing Area 1F

    Exit Hallway - Testing Area 1F

    Easy
    Above the door frame from the Monitoring Room.
    View location | Show on map
  • Image of Exit Hallway - Testing Area 1F

    Exit Hallway - Testing Area 1F

    Normal
    Above the door frame from the Monitoring Room.
    View location | Show on map
  • Image of Exit Hallway - Testing Area 1F

    Exit Hallway - Testing Area 1F

    Madhouse
    Above the door frame from the Monitoring Room.
    View location | Show on map
  • Image of Walkway - Boat House 1F

    Walkway - Boat House 1F

    Easy
    Underneath the fishing net in the north east hut.
    View location | Show on map
  • Image of Walkway - Boat House 1F

    Walkway - Boat House 1F

    Normal
    Underneath the fishing net in the north east hut.
    View location | Show on map
  • Image of Walkway - Boat House 1F

    Walkway - Boat House 1F

    Madhouse
    Underneath the fishing net in the north east hut.
    View location | Show on map
  • Image of Shaft - Wrecked Ship 3F

    Shaft - Wrecked Ship 3F

    Easy
    On the ledge northern ledge.
    View location | Show on map
  • Image of Shaft - Wrecked Ship 3F

    Shaft - Wrecked Ship 3F

    Normal
    On the ledge northern ledge.
    View location | Show on map
  • Image of Shaft - Wrecked Ship 3F

    Shaft - Wrecked Ship 3F

    Madhouse
    On the ledge northern ledge.
    View location | Show on map
  • Image of Side Stairs - Wrecked Ship 4F

    Side Stairs - Wrecked Ship 4F

    Easy
    On the ledge next to the stair banister.
    View location | Show on map
  • Image of Side Stairs - Wrecked Ship 4F

    Side Stairs - Wrecked Ship 4F

    Normal
    On the ledge next to the stair banister.
    View location | Show on map
  • Image of Side Stairs - Wrecked Ship 4F

    Side Stairs - Wrecked Ship 4F

    Madhouse
    On the ledge next to the stair banister.
    View location | Show on map
  • Image of Mine Office - Swamp

    Mine Office - Swamp

    Easy
    On the window ledge in the room with the ladder you entered in by.
    View location | Show on map
  • Image of Mine Office - Swamp

    Mine Office - Swamp

    Normal
    On the window ledge in the room with the ladder you entered in by.
    View location | Show on map
  • Image of Mine Office - Swamp

    Mine Office - Swamp

    Madhouse
    On the window ledge in the room with the ladder you entered in by.
    View location | Show on map
  • Image of North Cavern - Salt Mine B3

    North Cavern - Salt Mine B3

    Easy
    Next to the barrels on the upper level on the south side of the cavern. You need to be on the lower level to see it.
    View location | Show on map
  • Image of North Cavern - Salt Mine B3

    North Cavern - Salt Mine B3

    Normal
    Next to the barrels on the upper level on the south side of the cavern. You need to be on the lower level to see it.
    View location | Show on map
  • Image of North Cavern - Salt Mine B3

    North Cavern - Salt Mine B3

    Madhouse
    Next to the barrels on the upper level on the south side of the cavern. You need to be on the lower level to see it.
    View location | Show on map
  • Image of Storeroom - Guest House B1

    Storeroom - Guest House B1

    Easy
    On the shelves in the middle of the room. Only appears here when you return to this room after exploring the Salt Mine.
    View location | Show on map
  • Image of Storeroom - Guest House B1

    Storeroom - Guest House B1

    Normal
    On the shelves in the middle of the room. Only appears here when you return to this room after exploring the Salt Mine.
    View location | Show on map
  • Image of Storeroom - Guest House B1

    Storeroom - Guest House B1

    Madhouse
    On the shelves in the middle of the room. Only appears here when you return to this room after exploring the Salt Mine.
    View location | Show on map

There are no locations to show for this game mode. The following game modes are applicable:

Related product

Resident Evil Village Replica Iron Insignia Key

Resident Evil Village Replica Iron Insignia Key

Buy the Resident Evil Village Replica Iron Insignia Key on Amazon

Explore further